Deploying NextJS-SSR apps on AWS Amplify
Taking advantage of AWS free tier and hosting your NextJS app for absolutely free for the first 12 months!

INTRODUCTION
TBack in the day, vercel allowed hosting private github organization repos in their free plan, not anymore. They require you to subscribe to their paid plan which costs around $20/mo per seat whereas AWS amplify is free for first 12 months and after that you pay only for the bandwidth you use. They also do not charge anything per seat as vercel does. AWS amplify has its limitations when it comes to hosting a NextJS app. For example, they don't support on demand ISR, edge API routes, nextjs steaming and the new unstable_after hook that came in next 15.
Although these features are really important to have when it comes to apps like e-commerce etc but a point to consider aws is that vercel itself doesn't work properly with on-demand ISR, you can read more about it here.
IMPLEMENTATION
Configuring your NextJS app to build in standalone mode
If you want to host a nextjs app anywhere else than vercel, you need to make a small change in the next.config.js|mjs file, it's the output flag, after making the change, your next.config file should look something like this:
1module.exports= {
2    output:'standalone',
3    // rest of your configuration
4}
After making this change, run the build command with your preferred package manager. This will create a folder at .next/standalone which can then be deployed on its own without installing node_modules.
Additionally, a minimal server.js file is also output which can be used instead of next start.
This minimal server does not copy the public or .next/static folders by default as these should ideally be handled by a CDN instead, although these folders can be copied to the standalone/public and standalone/.next/static folders manually (which we have handled in your amplify.yml file already), after which server.js file will serve these automatically.
Configuring amplify app
Before following the configuration part, I assume you have already created an AWS account and you're ready to create your amplify app.
An AWS amplify deployment comprises of two main things that help with the deployment of a NextJS application:
1. Framework - The framwork is auto detected by amplify when you connect your source code via github and other similar VCS.
2. Platform - The platform is picked based on the amplify.yml file (example given below in this blog) which resides the root directory of your project that you have shipped in your VCS.
An example of amplify.yml file
1version: 1
2    frontend:
3    phases:
4        preBuild:
5            commands:
6                - npm ci
7        build:
8            commands:
9                - npm run build
10    artifacts:
11        baseDirectory: .next
12        files:
13            - '**/*'
14    cache:
15        paths:
16            - node_modules/**/*
Note that the baseDirectory is set to .next, this indicates that the build artifacts are for a Next.js app that supports SSG and SSR pages.
An example of amplify.yml file in mono-repo architecture
1version: 1
2applications:
3  - frontend:
4      phases:
5        preBuild:
6          commands:
7            - corepack enable
8            - pnpm install
9        build:
10          commands:
11            - touch apps/web/.env
12            - echo copying env variables
13            - env | grep -e STRIPE_SECRET_KEY -e STRIPE_WEBHOOK_SECRET -e STRIPE_PRICE_ID >> apps/web/.env
14            - env | grep -e NEXT_PUBLIC_ >> apps/web/.env
15            - pnpm build --filter=web
16        postBuild:
17          commands:
18            - cp -r apps/web/.next/static/. apps/web/.next/standalone/apps/web/.next/static
19            - cp -r apps/web/public apps/web/.next/standalone/public
20            - cp -r apps/web/.next/standalone/apps/web/* apps/web/.next/standalone/
21      artifacts:
22        baseDirectory: apps/web/.next
23        files:
24          - "**/*"
25      cache:
26        paths:
27          - $(pnpm store path)
28      buildPath: /
29    appRoot: apps/web
30
Depending on the project architecture you've employed, either of the amplify.yml files can come in handy. Once you've identified which kind of architecture you're using, create the amplify.yml in your project's root directory or the root directory of your app if you're using the mono-repo architecture.
Let's get into setting up the amplify app on AWS console!

Open your AWS console head over the Amplify page and hit create project button as shown in the image above, follow the steps shown by the amplify wizard and connect your project's source code with your git provider.
If your project is setup in a mono-repo architecture, check the My app is a monorepo field as shown in the image above and enter the root directory of your app, for example, apps/web.
Hit the next button, and if everything goes well, amplify will auto-detect your framework from your package.json and amplify.yml (which is nextjs in this case) as well the platform (which should be WEB_COMPUTE) as shown in the image below.
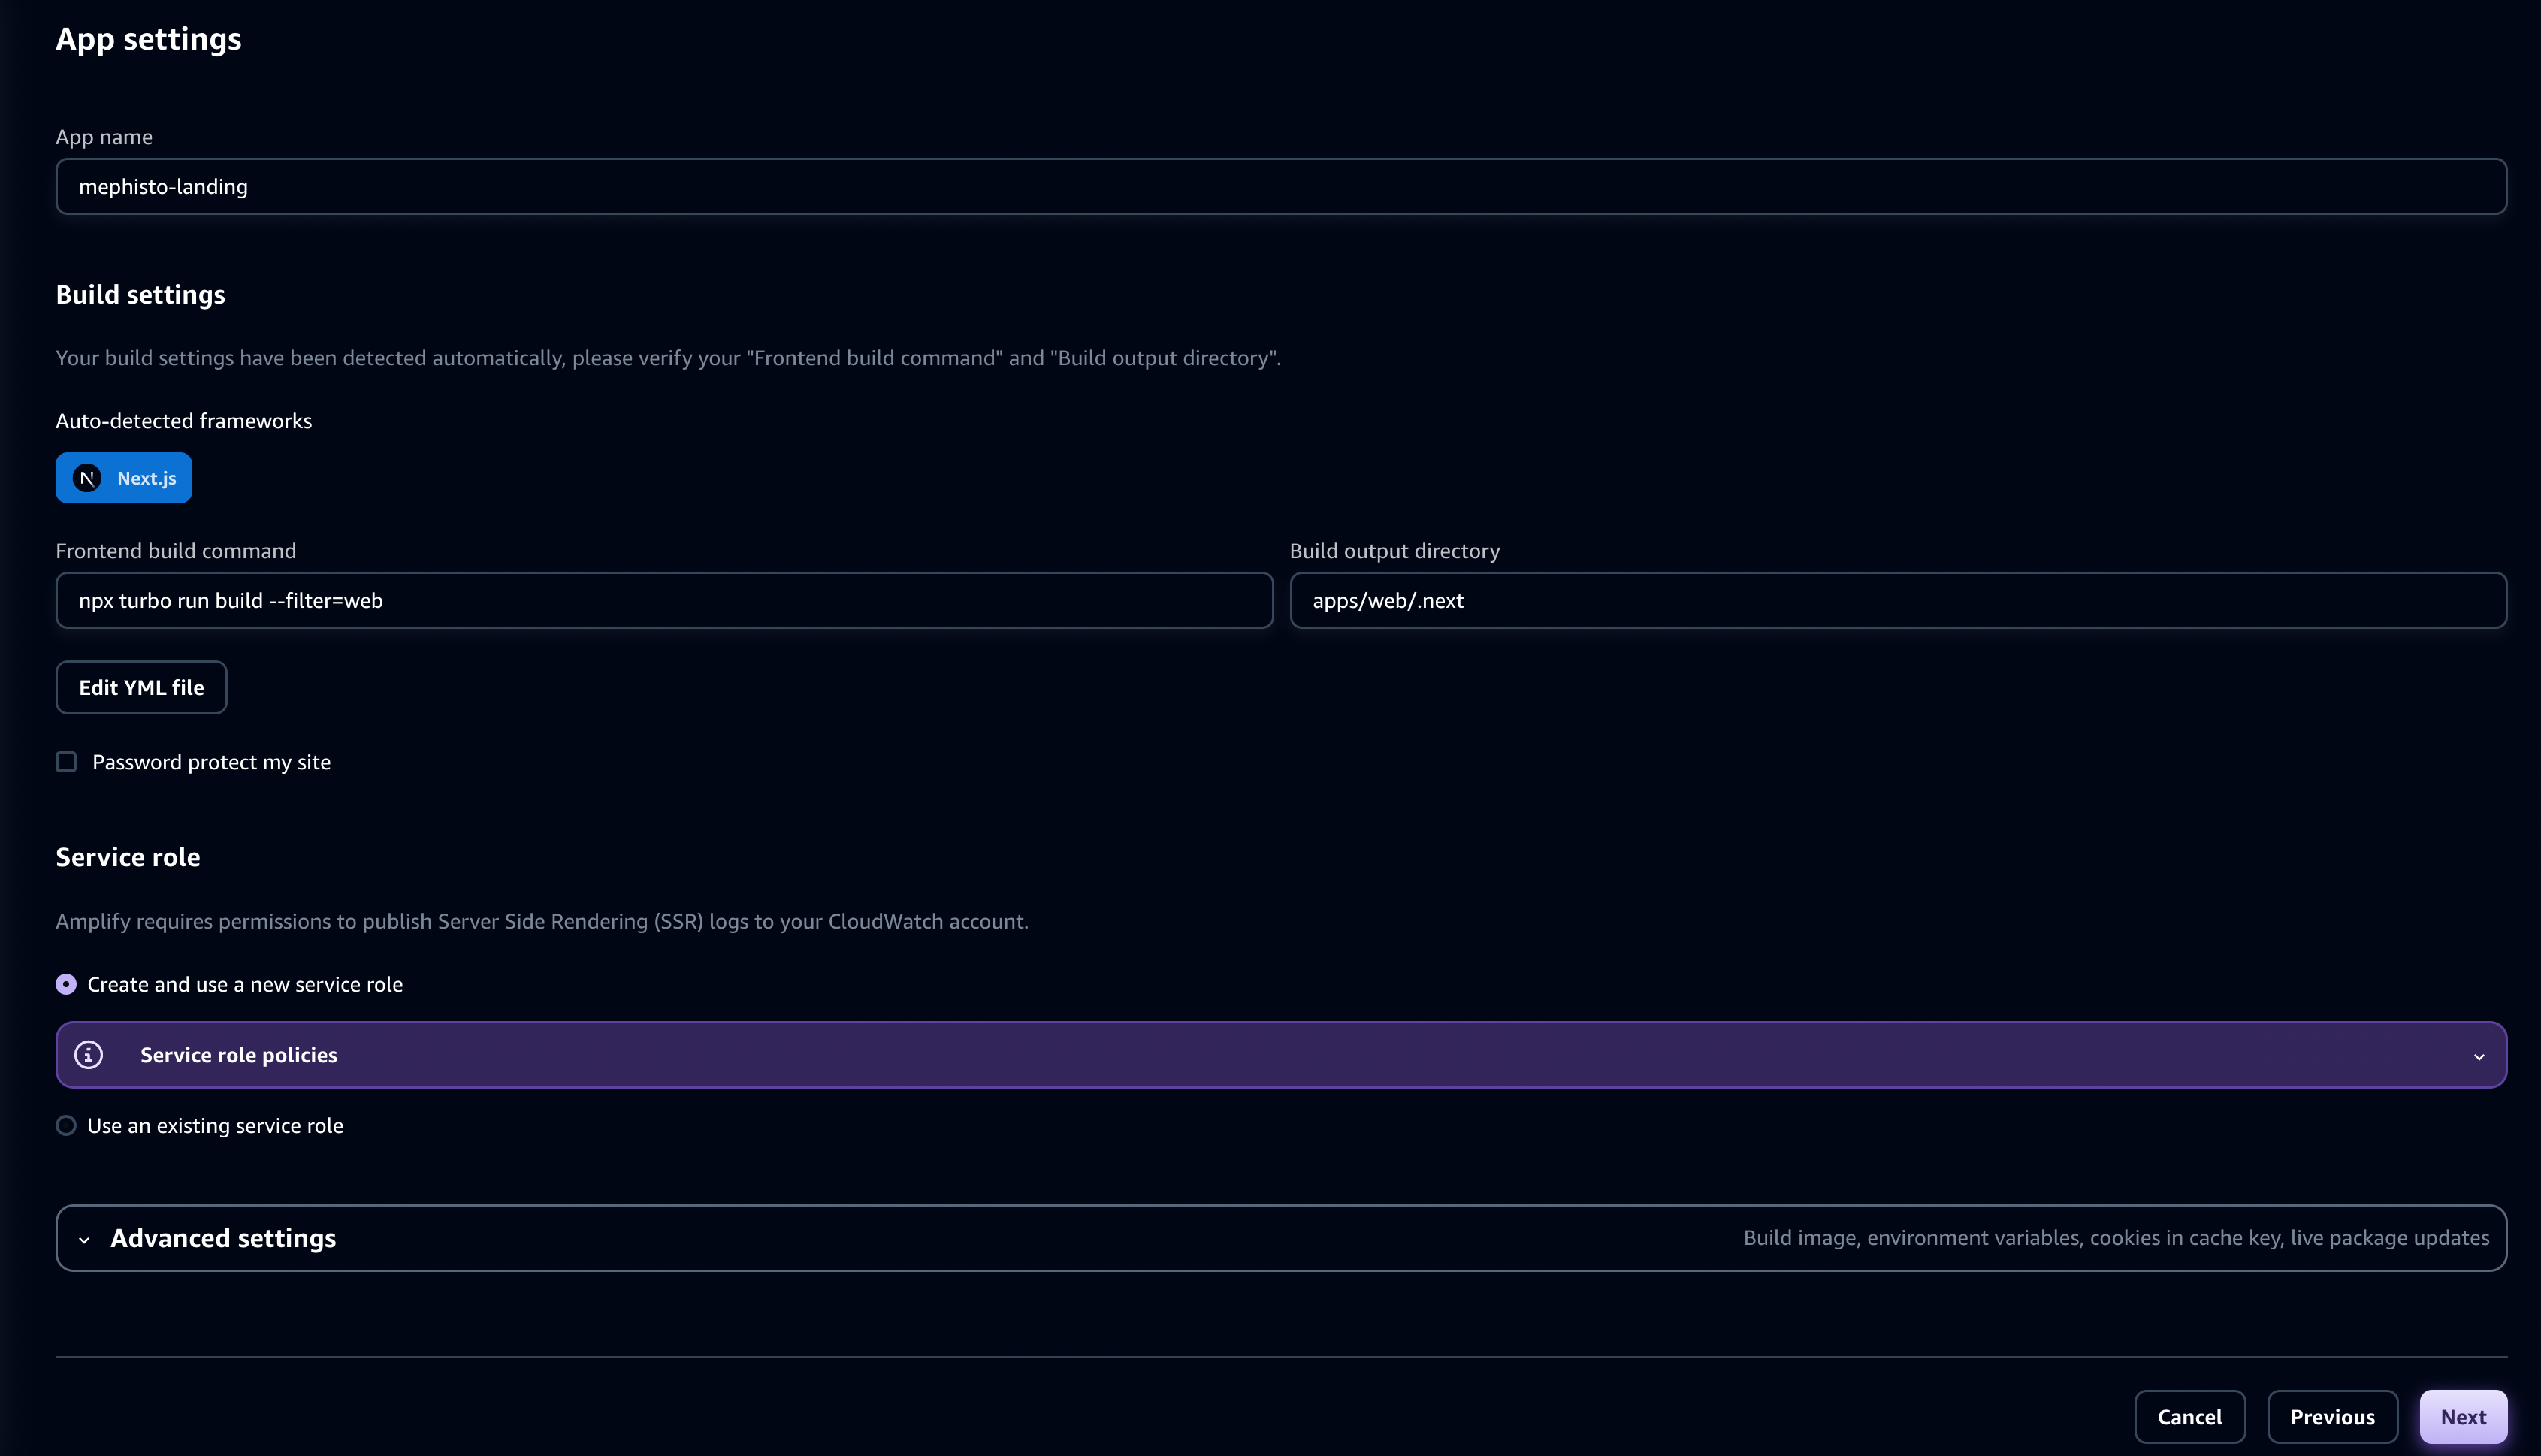
Once you've verified the auto detected framework and other settings, hit the next button as shown in the image above to go to the review page, which should look something like the image below
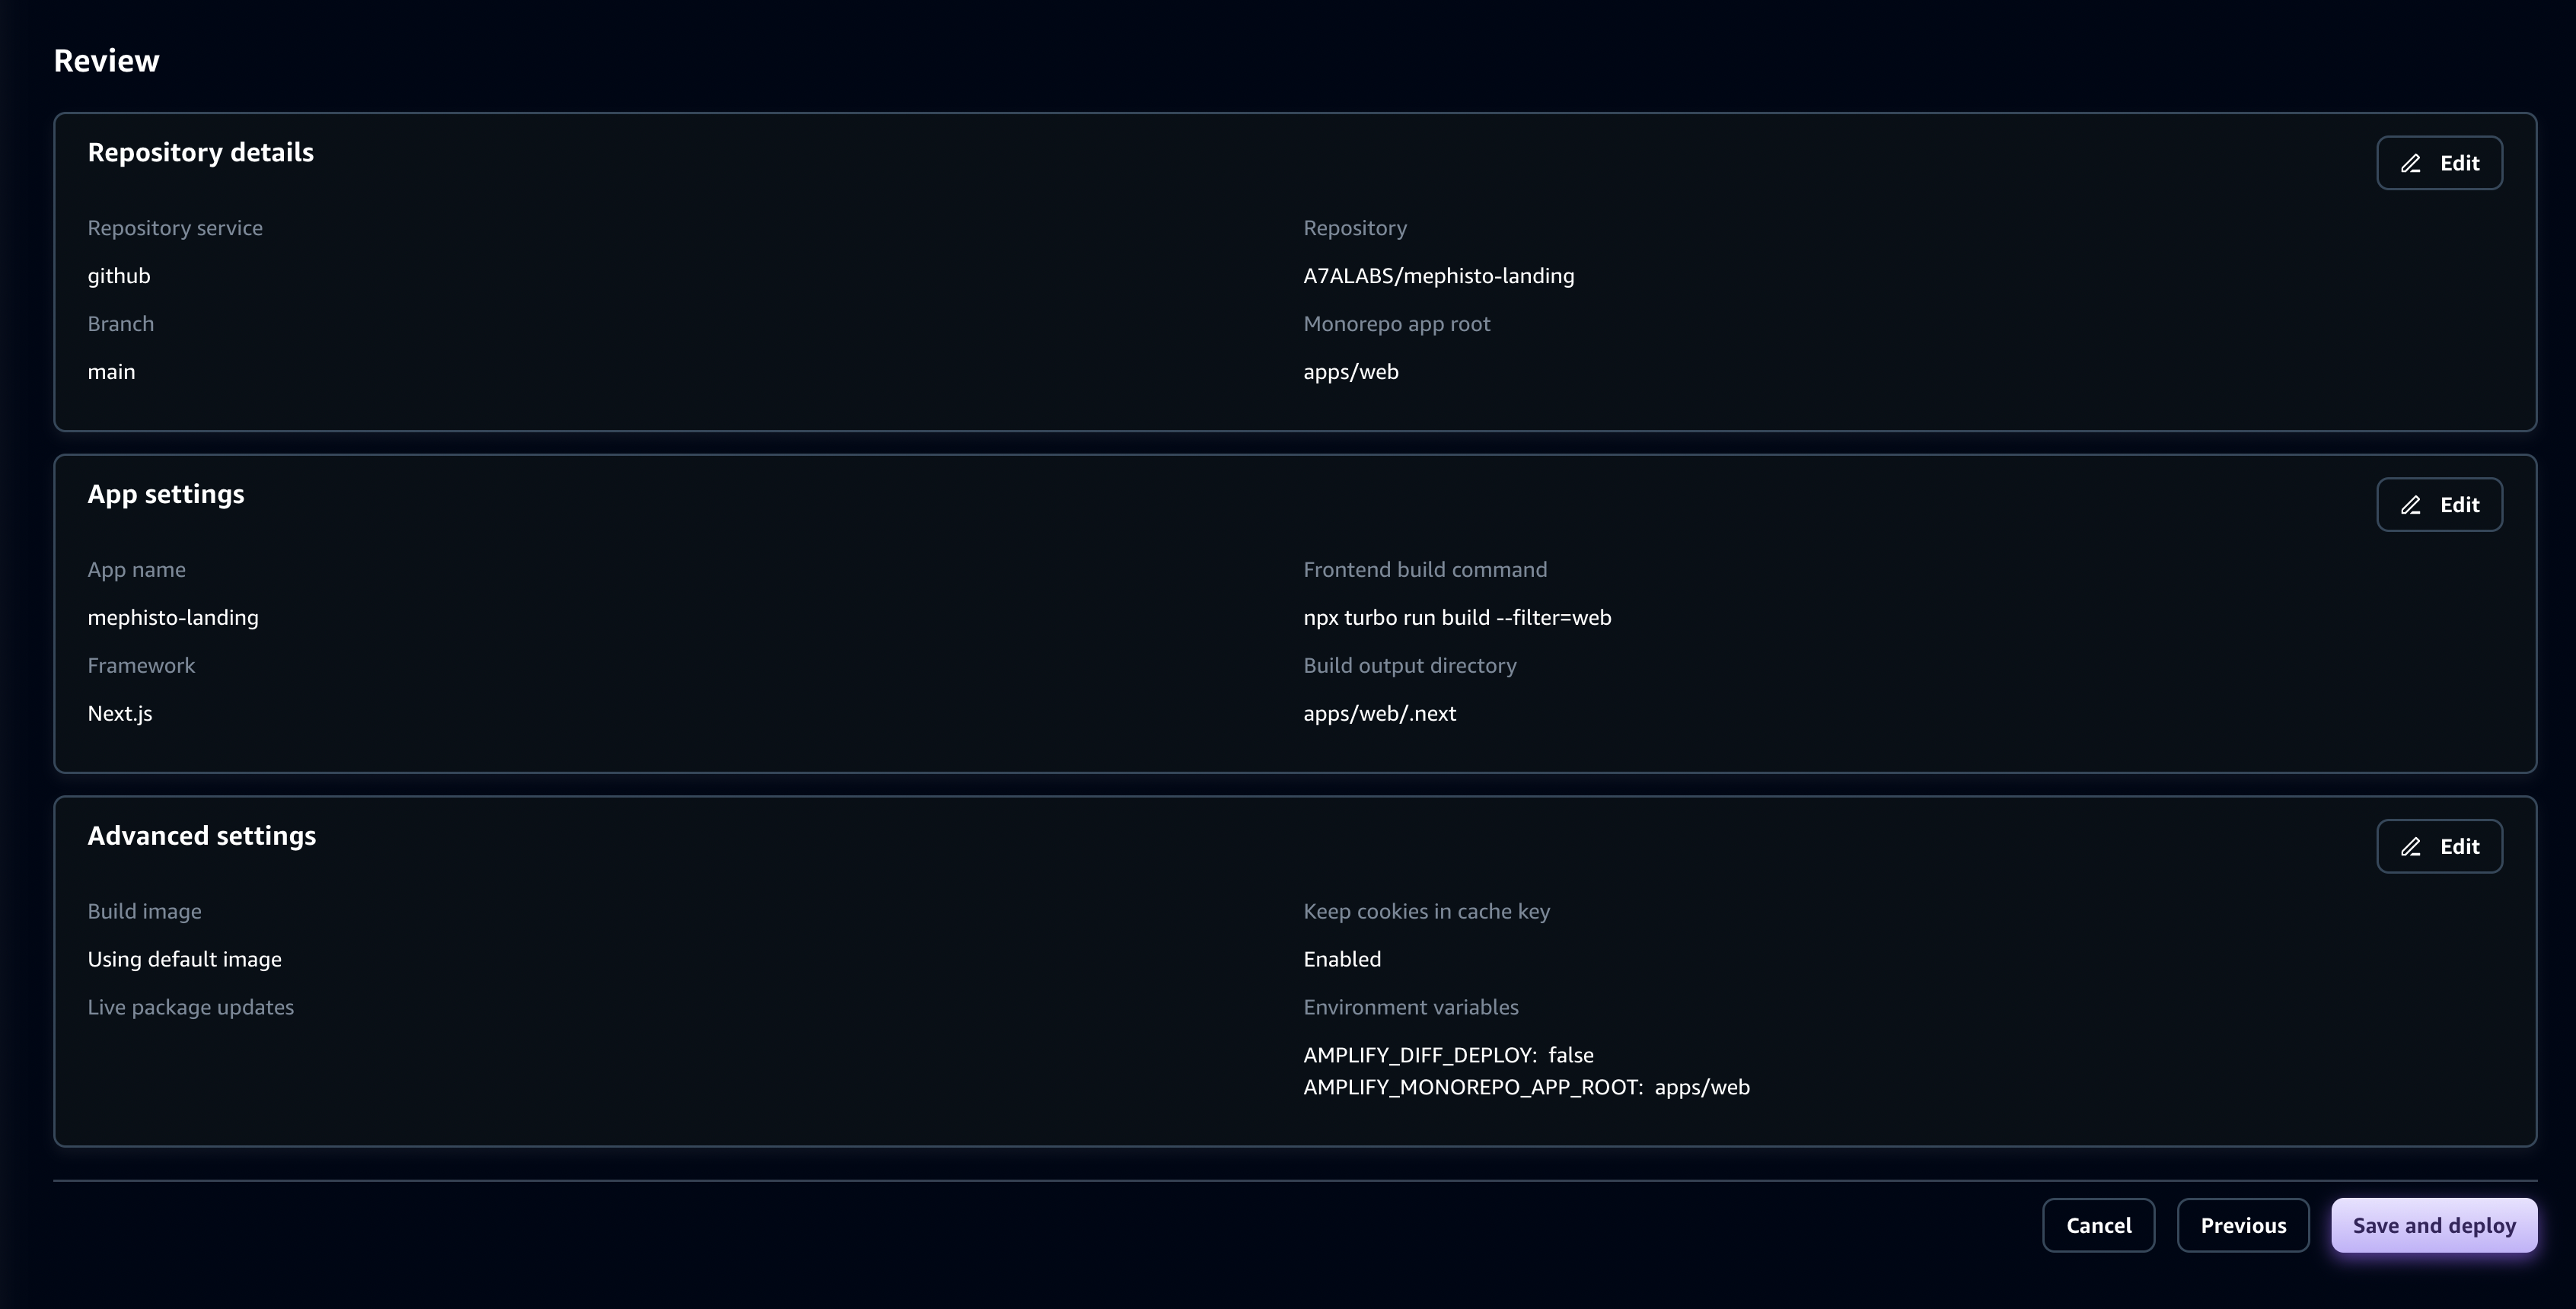
If everything is as per your specifications, hit the save and deploy button and in around 5-8 mins, your NextJS app will be deployed on AWS amplify!
Connecting your domain
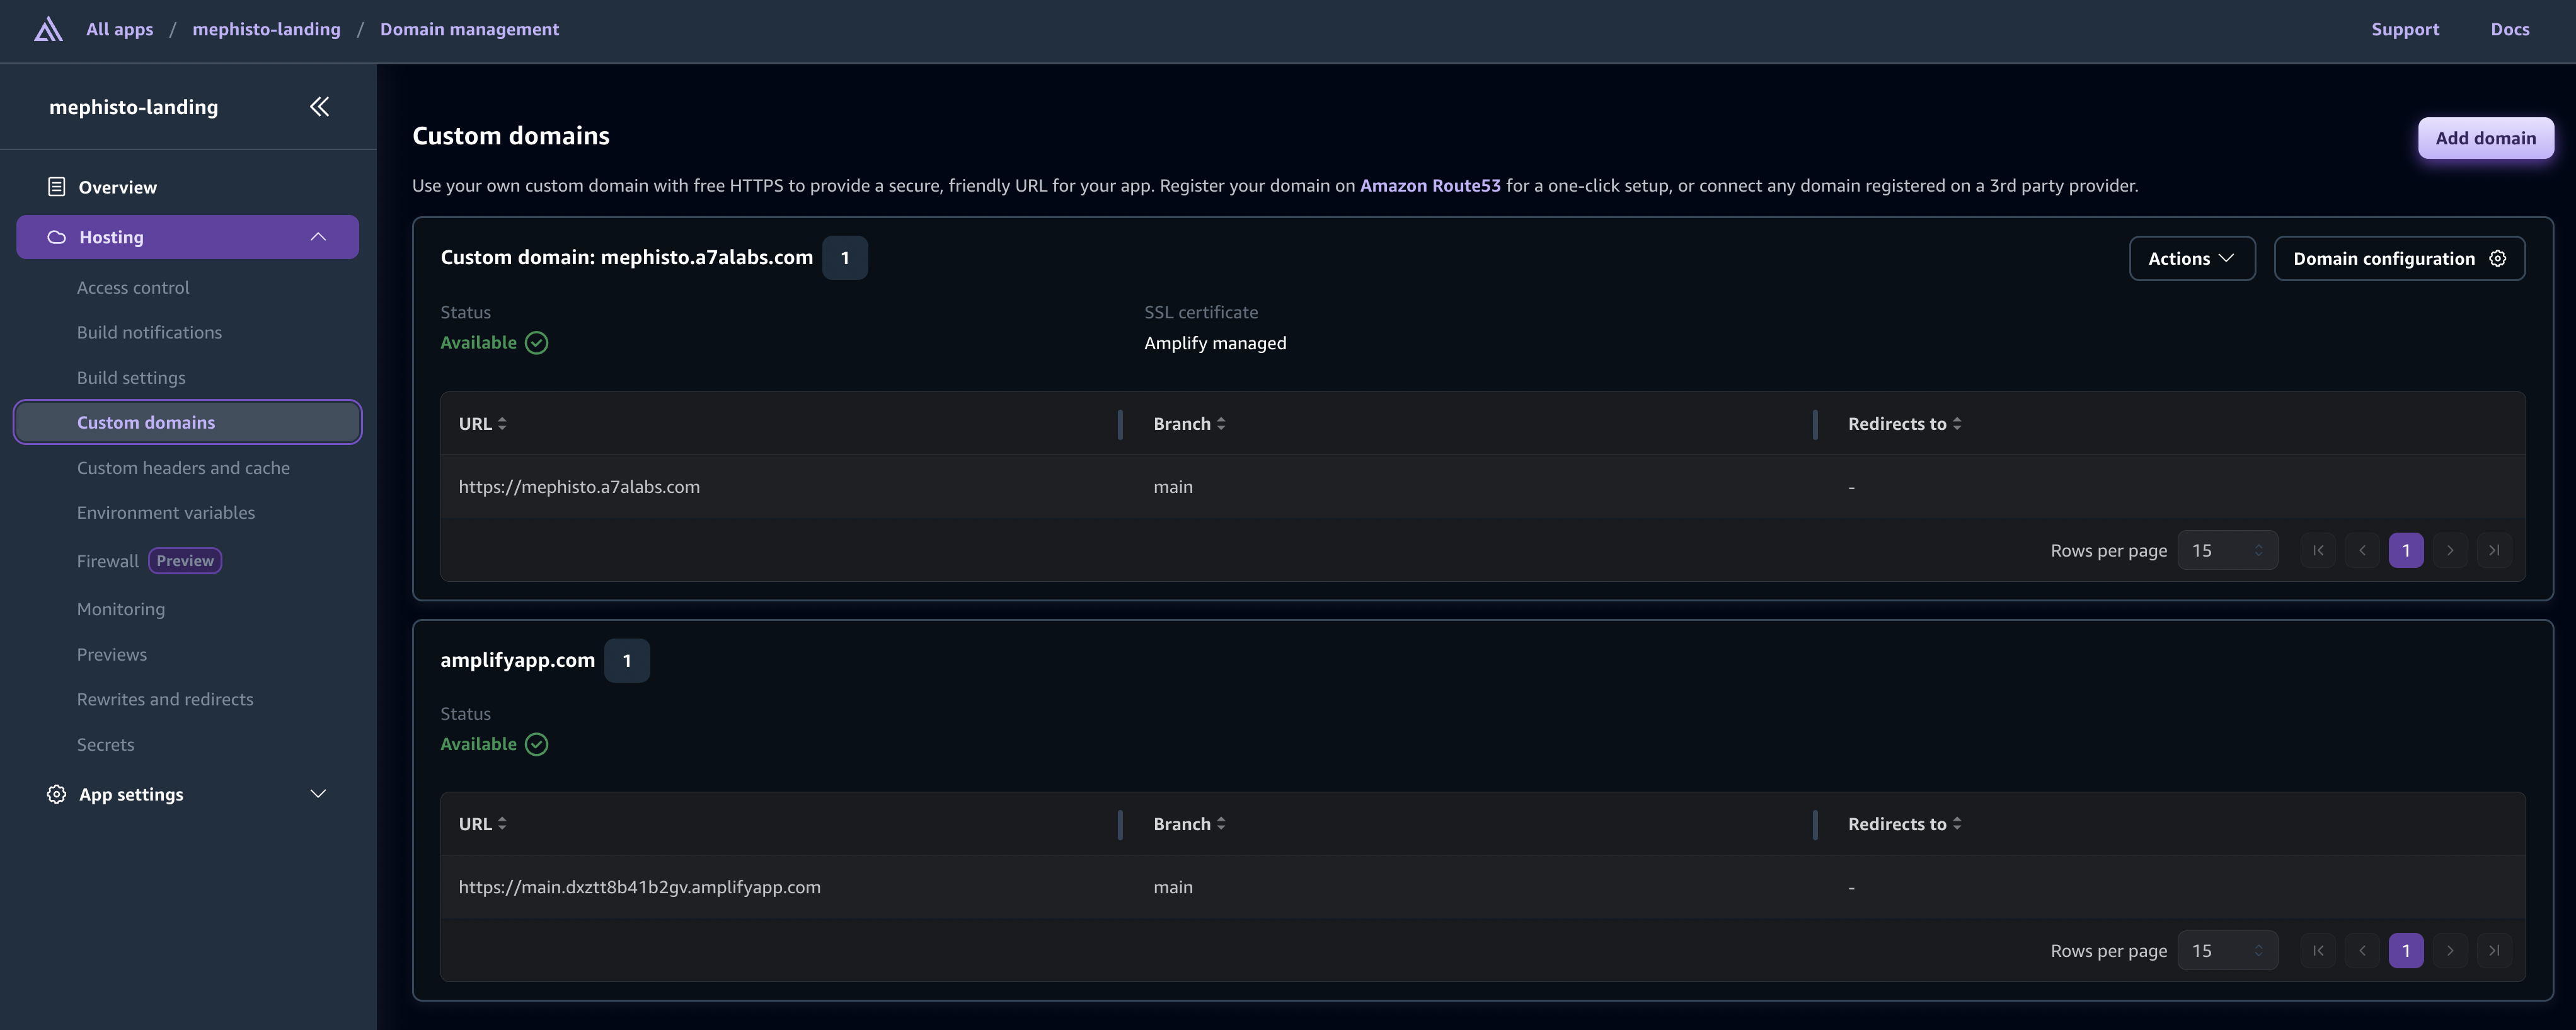
Setting up your custom domain in AWS amplify is a piece of cake, just go to the amplify project page, and head over the to custom domain section that resides in the Hosting menu in the left panel. Open the custom domain section and you should see an Add domain button there. Here's how it should look like:
CONCLUSION
In conclusion, while Vercel and AWS Amplify both offer compelling options for hosting Next.js applications, the choice ultimately depends on your project’s needs and budget. Vercel excels in delivering cutting-edge Next.js features but comes with a higher cost, especially for teams managing private repositories. On the other hand, AWS Amplify provides an affordable alternative with a pay-as-you-go model, making it an excellent choice for those who prioritize cost-efficiency over advanced Next.js capabilities. However, as both platforms have their limitations, it’s crucial to weigh the pros and cons carefully to determine the best fit for your specific use case.
